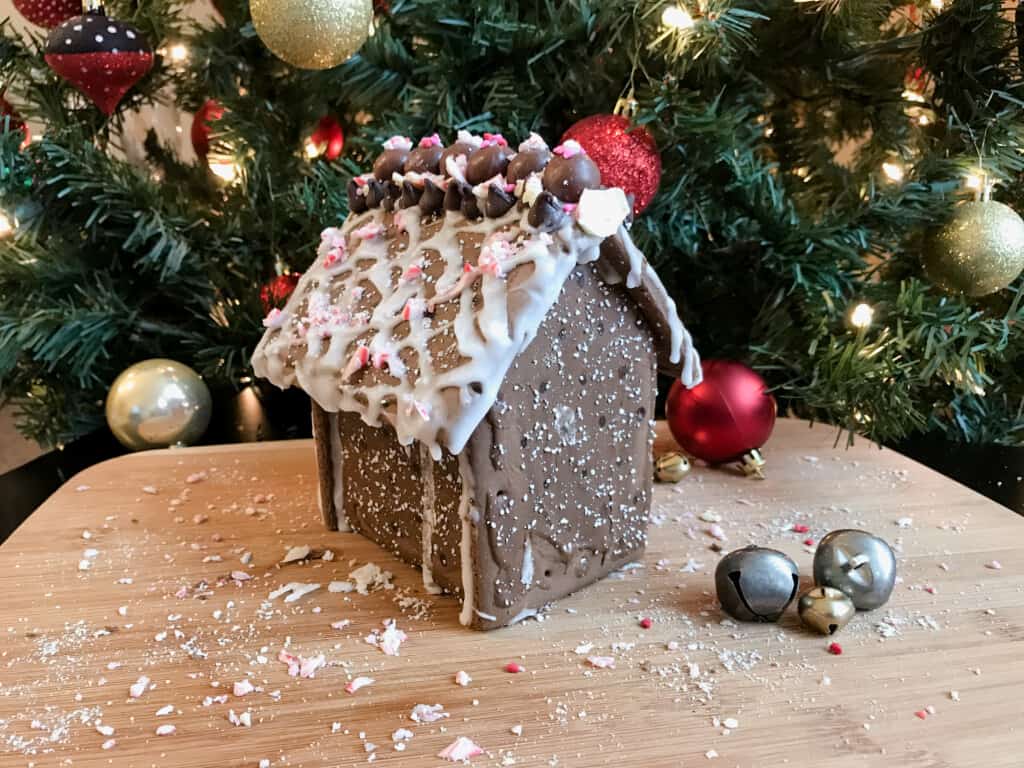
It's that magical time of the year full of holiday cheer, hot cocoa and yummy delicious treats! And what holiday season is complete without Gingerbread Houses!? This year though we introduce to you, Pop Tart Gingerbread Houses!
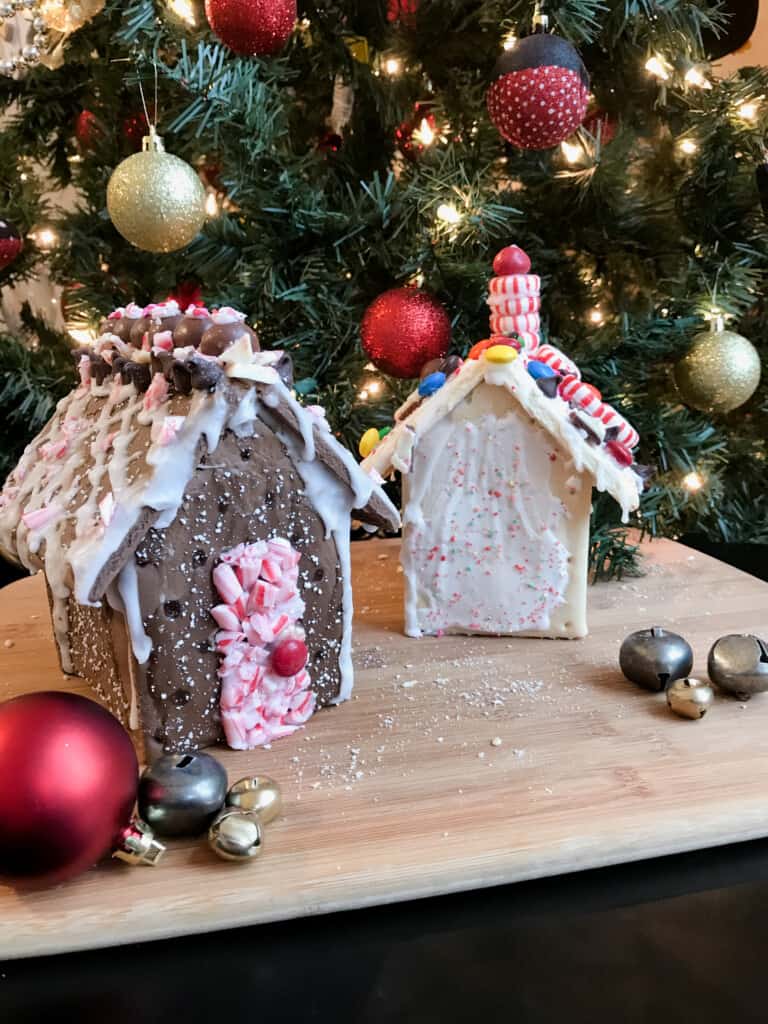
If you haven't already, it is time to say goodbye to those old traditional gingerbread houses and hello to these DIY bad boys! Now, I know you may be thinking ... wait, is this a recipe or is this a craft? I dare say it is both. And I remind you, life is always better when you can play with your food!
After using pop tarts to build your gingerbread houses you will never go back. Because when it comes to other more traditional building materials like graham crackers and sheets of gingerbread there are just so many perks to using toaster treats.
And if you happen to be looking for other festive and delicious treats to serve up this holiday season we have you covered. Treats like these Chocolate Pretzel Wreaths or Holiday Popcorn Balls are crowd pleasers sure to bring cheer to all.
And while we are at it, who can forget these ooey-gooey Caramel Rolls or Dutch Apple Crumb Pie, Chocolate Chip Cookies or German Chocolate Caramel Brownies? Talk about sweet treats that are made for the holidays! Yummm.
🥘 Ingredients
- Pop Tarts or Toaster Treats - Great way to fully customize the experience. Everyone can have a different holiday house based on their favorite colors or taste preferences. If needing a little inspiration check out more than 20 different Pop Tart flavors.
- Powdered Sugar
- Water
🍳 Step by Step Instructions
Not a carpenter or much of a handyman? It's okay, don't be intimidated. Firstly, we want to get our materials cut to size. When cutting make sure to have a serrated knife handy. THIS IS GOING TO BE KEY.
Pressing down on the pop tarts too hard while cutting will cause them to crack. Gentle sawing motions yield the best pop tart gingerbread houses.
Cutting your Pieces
Following the examples below place two pop tarts next to one another, one laying horizontally and the other butted up against it vertically.
Using a serrated knife, carefully saw away at the top corners of the vertical pop tart using the horizontal pop tart as your guide. This will create slants for your roof to lay against.
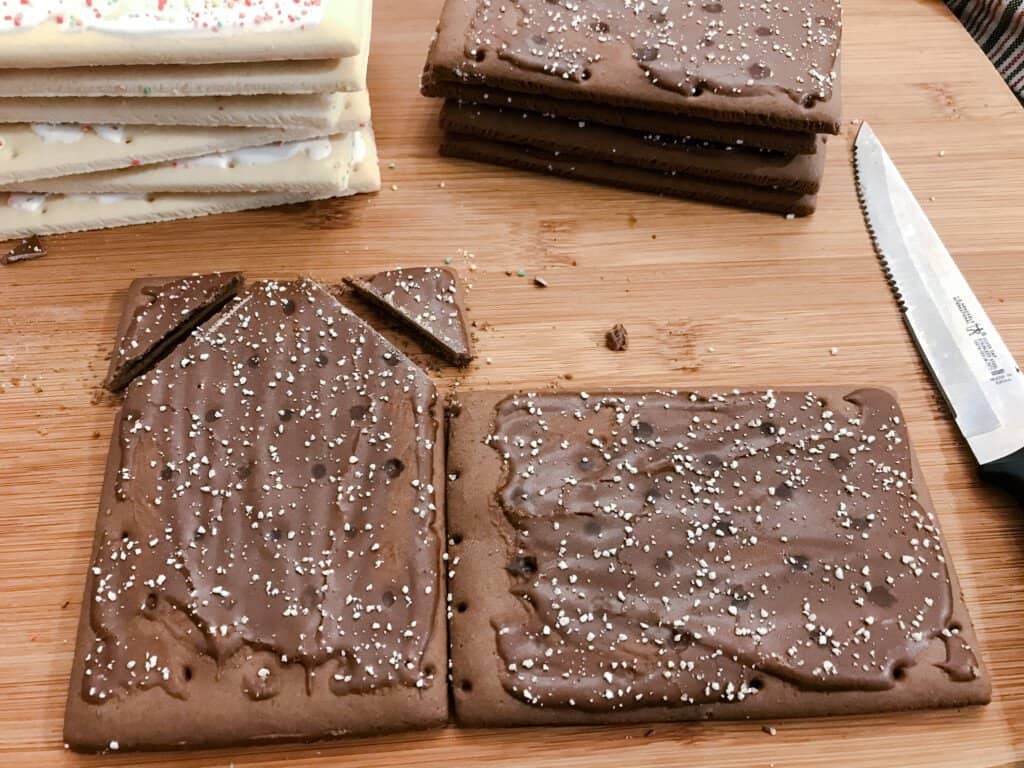
Turn your horizontal pop tart side ways so the top edge meets the corner of the slant you just made and carefully saw off the over hanging edge so the second pop tart is now a square.
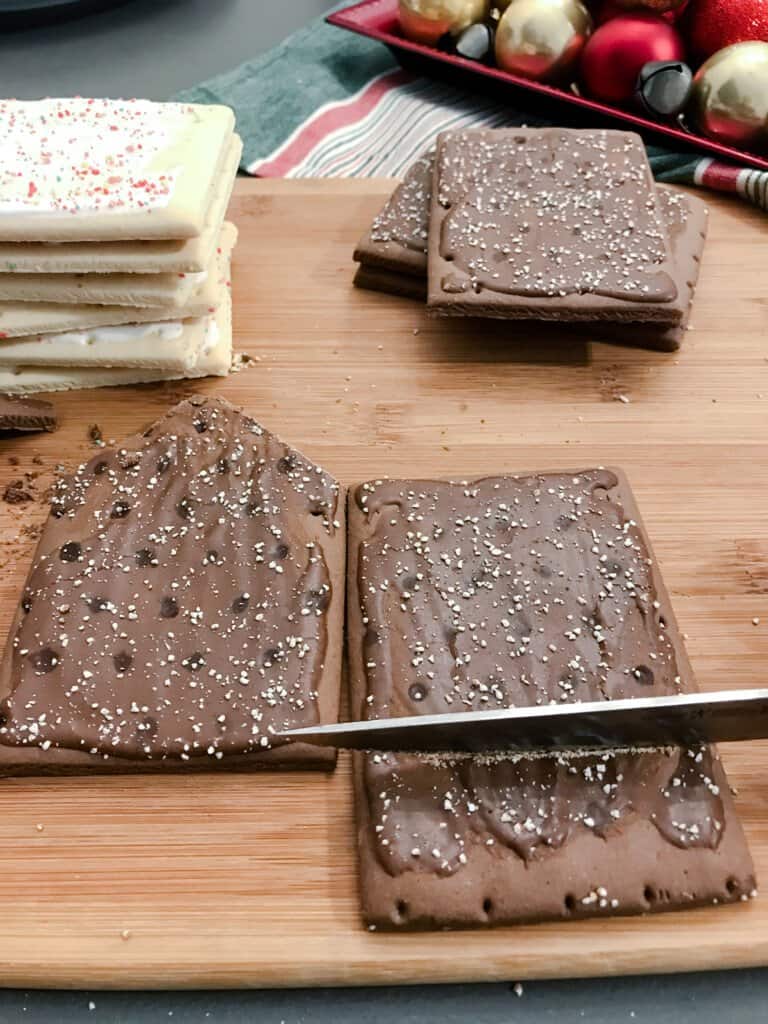
Then you will want to repeat the first two steps. This should give you two of each piece, in addition to two whole pop tarts you will use for the roof pieces later. This is what your building materials should look like for each house when ready to assemble.
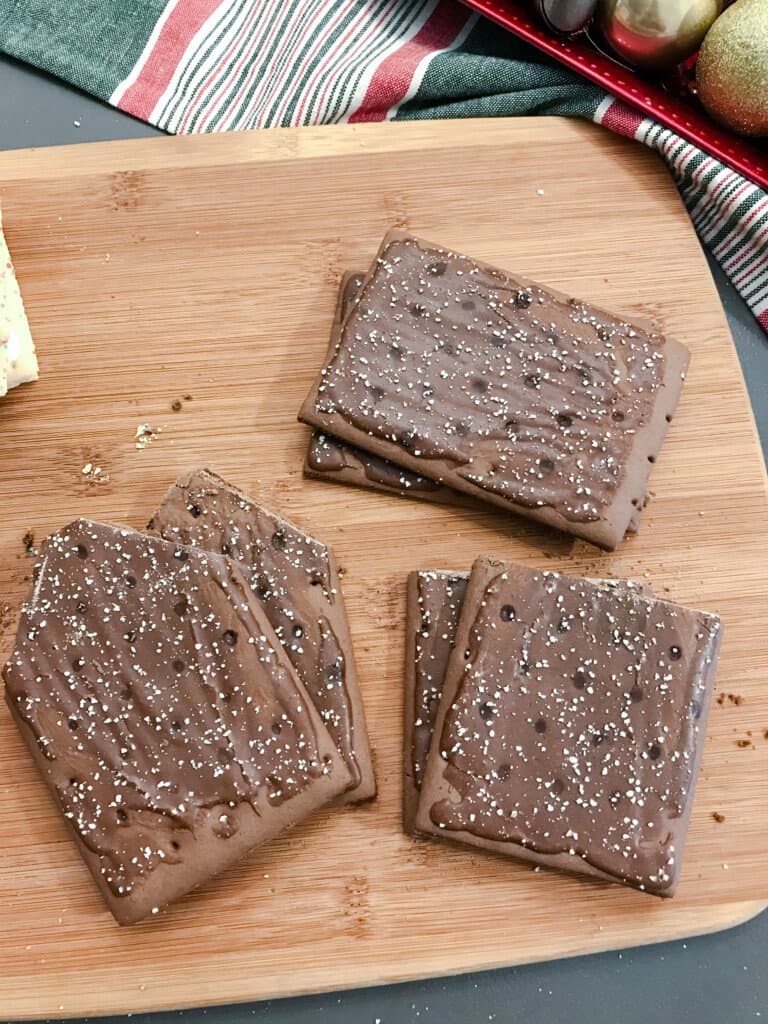
Assembling your House
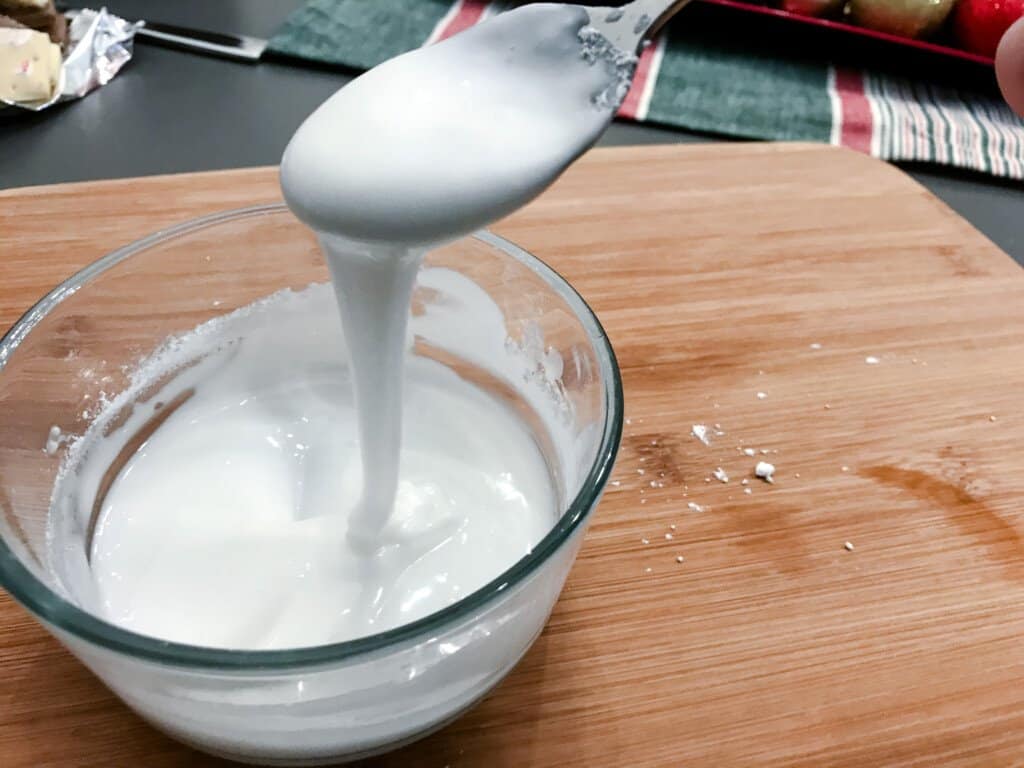
To begin assembling your house we first need to prepare the royal icing that is going to act as a glue or cement to keep the pieces together. We will do this by adding a teaspoon of water to your powdered sugar at a time.
Ideal icing will have a thicker consistency, more of a concrete or paste texture than a thin runny glue. If the icing is looking too thin, add more powdered sugar. Repeat this until the desired consistency is reached.
Then using the royal icing, assemble your Pop Tart Gingerbread House by placing one of the angled pop tart pieces face down. Using a healthy amount of icing, apply a line where your first square side piece will go. Then repeat this with the other side.
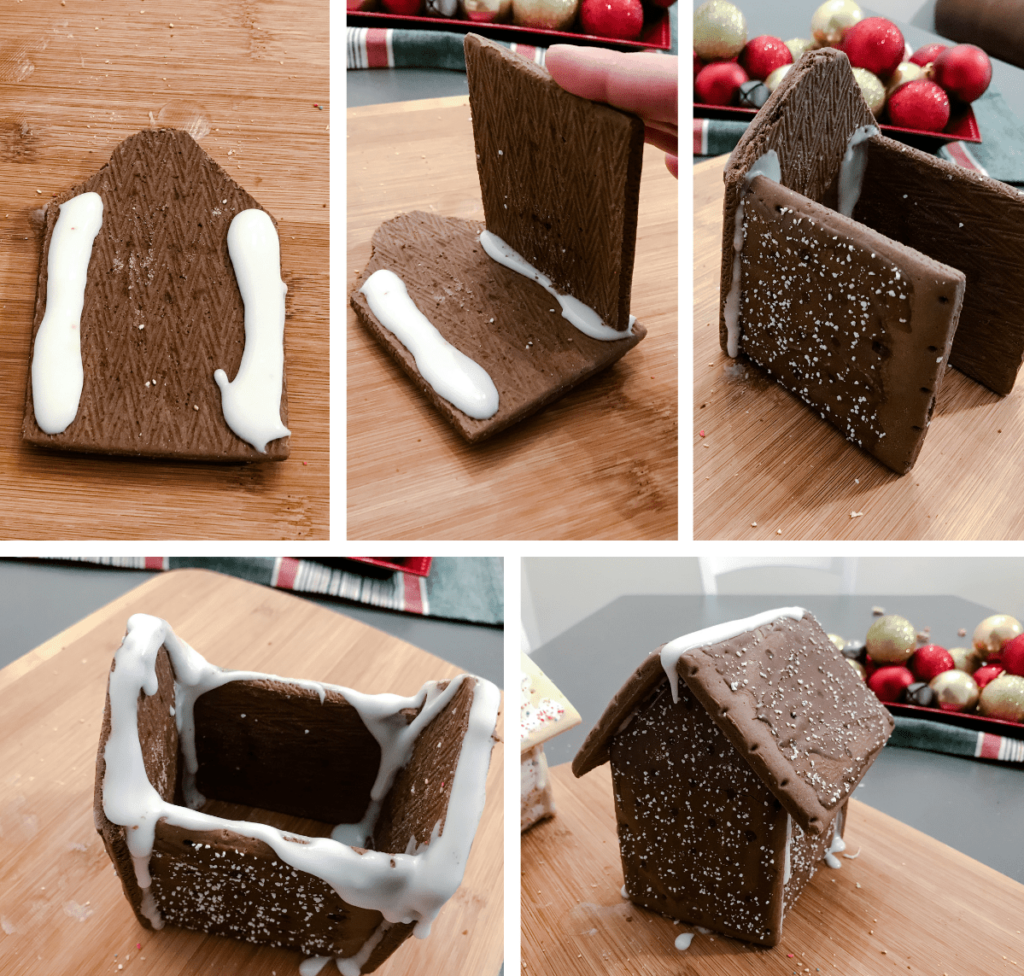
Next, carefully stand the house up and apply the second slanted piece so the base of the house is now assembled. Let this set for 5 minutes before applying the roof pieces.
Once dried use a generous amount of icing to apply the whole pop tarts to the top of the gingerbread house base, one side at a time. You will have to hold these pieces on for a moment to make sue they are secure.
Congratulations, your house is now complete! You can either let the house sit to allow it some time to dry or you can choose to go ahead decorate, just being careful as your structure is still a little unstable.
👩🏻🍳 Make It You Own
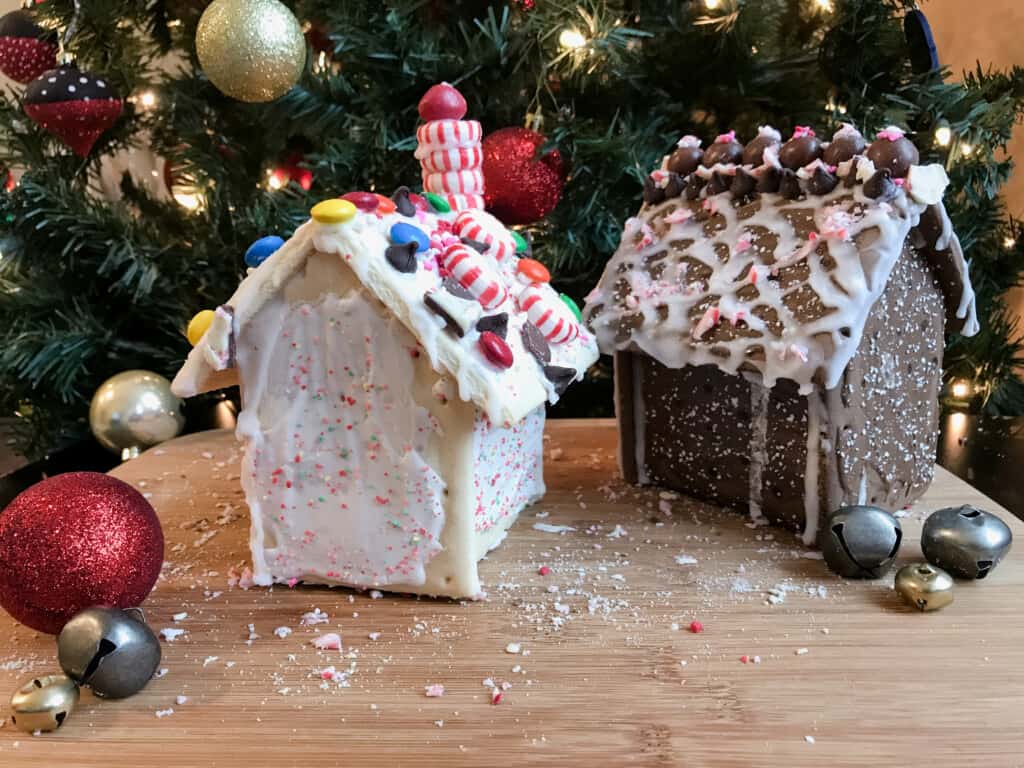
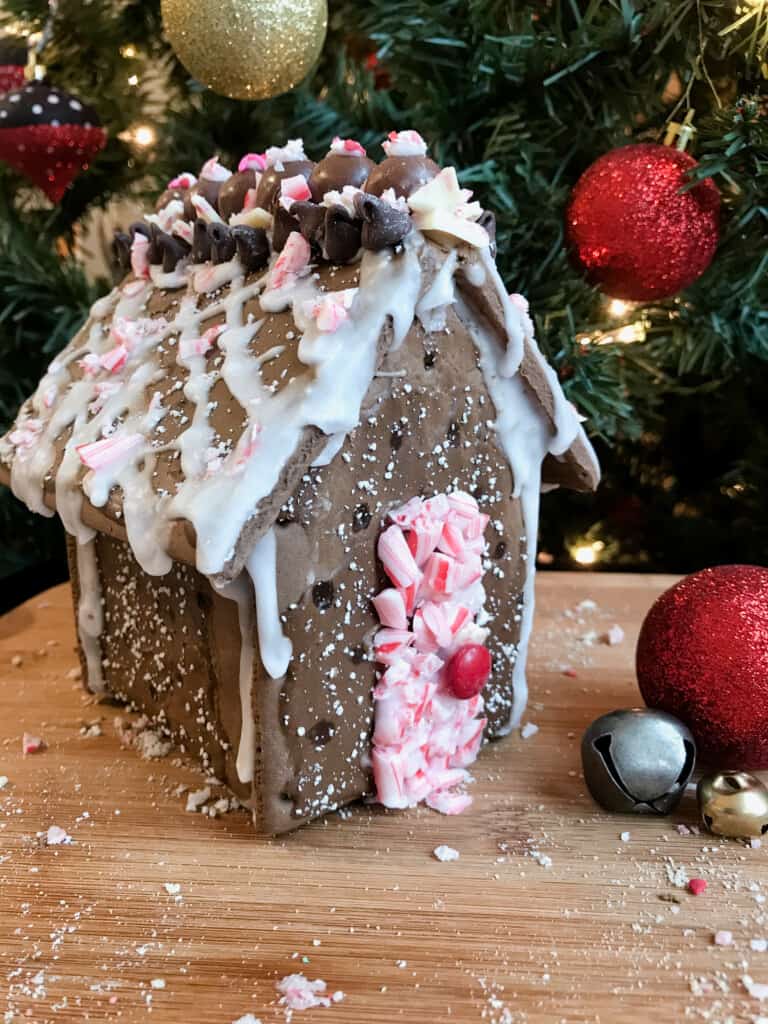
Now that your houses are built, it is time to decorate! Really, anything goes when it comes to decorating.
Popcorn, cereal, candies, peppermints, pretzels, paper, powdered sugar, sprinkles, banana chips, you name it! Get creative with your decorating materials, go wild with your design.

There is definitely no right or wrong way to decorate a Pop Tart Gingerbread House. I will be the first to confess, we are not pro-decorators here. Where we may lack in skill or technique we make up for in fun and whimsy!
So, don't be afraid to let your guard down. We dare you to really make it your own. Throw caution to the wind and let creativity be your guide.
And if you are looking for something yummy to munch on while you wait for your house to dry, you've got to give some of these tasty treats a go.
Our little kids love helping make these easy no bake Scotcheroo Bars or crushing up the cookies for this delicious no bake Oreo Cheesecake Pie.
💭 Top Tips
If planning to decorate with young children I would definitely suggest making your structure before hand and giving it 3 or 4 hours to dry and really set up. This way your house stands a better chance against any bumping or shaking during the decorating process.
Building the houses also requires a little more of a delicate touch than our kids were ready for. The next time we make these Pop Tart Holiday Houses we will definitely be assembling the houses ahead of time.
📋 FAQ's
Can I use Pop Tarts to build a Gingerbread House?
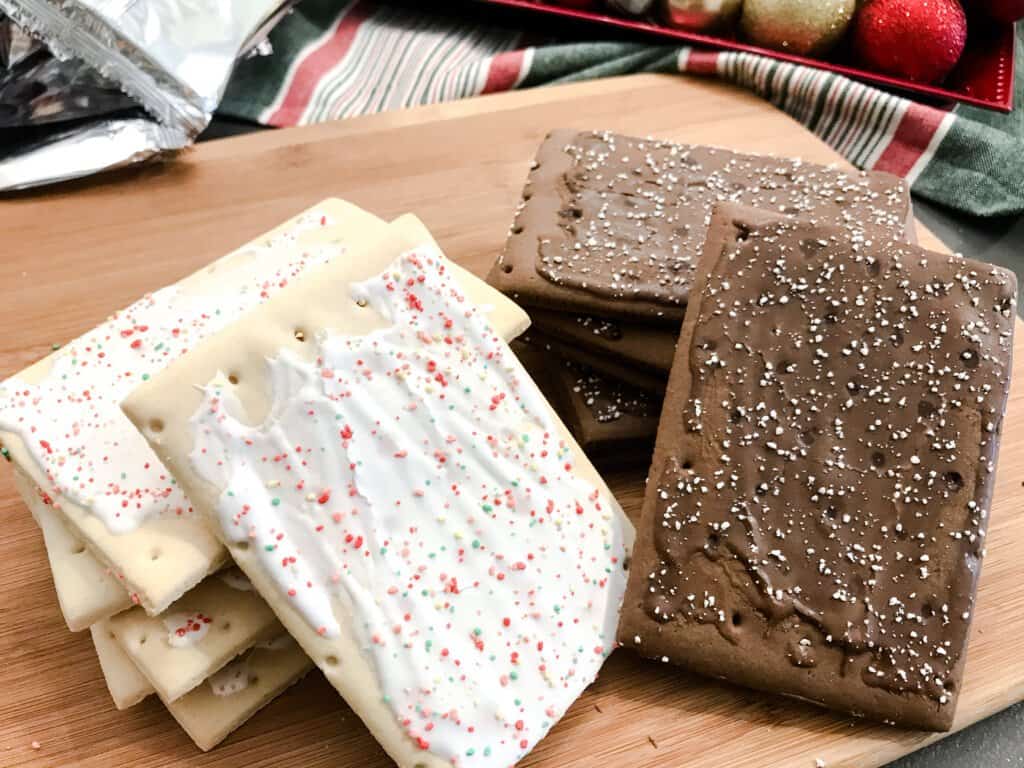
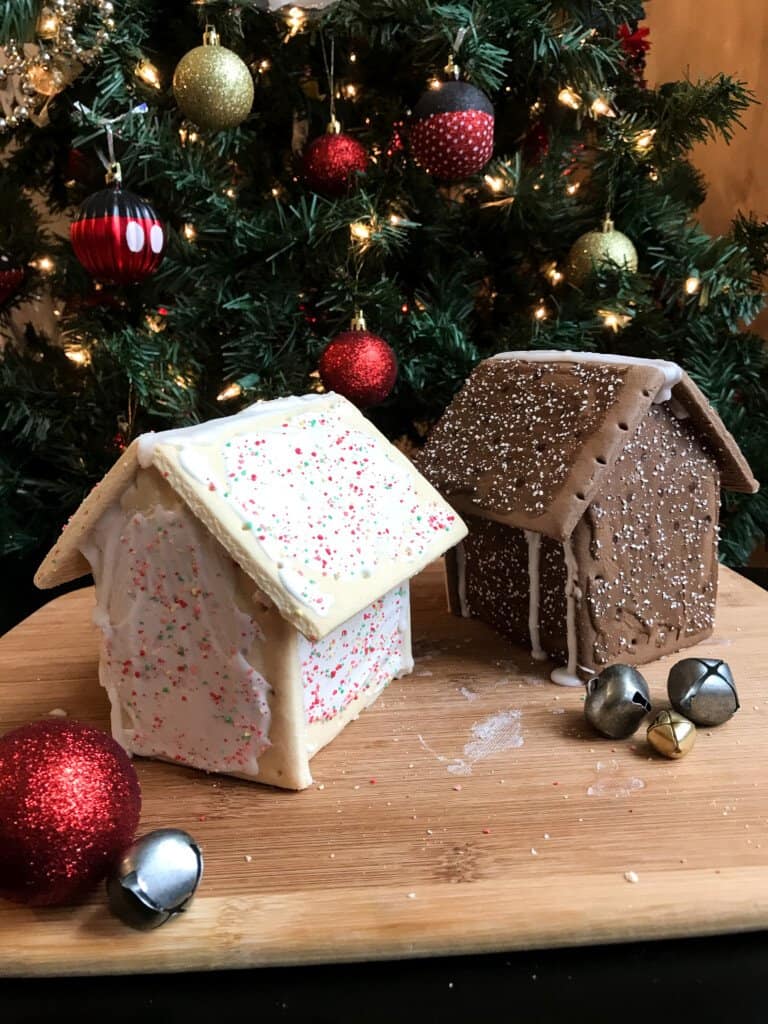
Pop Tarts or Toaster Treats are some of our favorite building materials when it comes to Gingerbread House construction. Using Pop Tarts makes for bigger sturdier houses.
I mean look how much larger and thicker these are then graham crackers. Honestly I don't know why we haven't used these sooner.
PLUS, using Pop Tarts means your building materials come already partially pre-decorated! I mean seriously, how cute are these houses with the frosting and the sprinkles?! Talk about a huge plus already being semi decorated. You could easily leave your pop tart gingerbread house as is after assembling. No extra decorations required.
What kind of icing do you use when building a Gingerbread House?
Royal Icing is the simplest and best adhesive for your house. You want to prepare the royal icing using powdered sugar and water.
Ideal icing will have a thicker consistency, more of a concrete or paste texture than a thin runny glue. If the icing is looking too thin, add more powdered sugar. Repeat this until the desired consistency is reached.
📖 Recipe
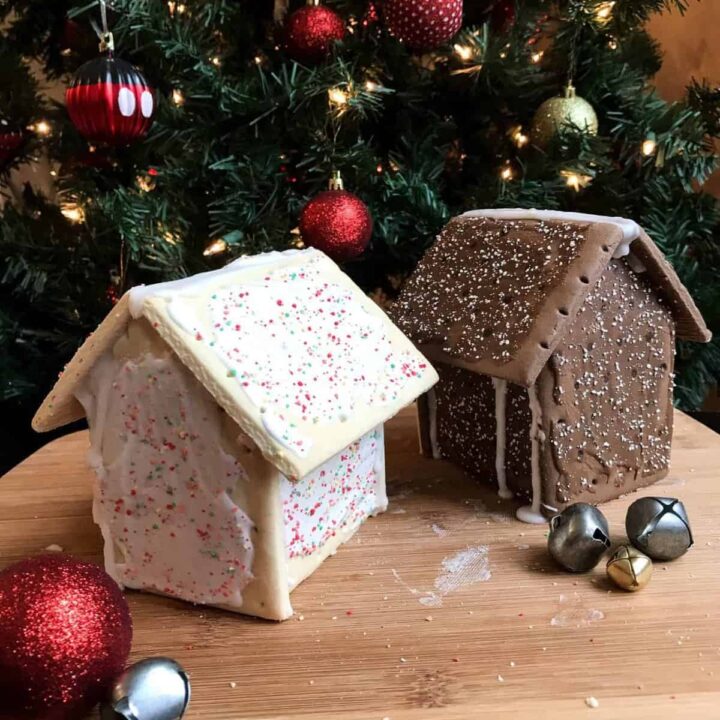
DIY Holiday Houses with Pop Tarts
Fun and unexpected twist on traditional gingerbread houses. Use Pop Tarts to DIY your own gingerbread houses this year with these step by step instructions.
Ingredients
- 6 pop tart treats (any flavor or brand)
- powdered sugar
- water
Instructions
- Following the example images above place two pop tarts next to one another, one laying horizontally and the other butted up against it vertically.
- Using a serrated knife, carefully saw away at the top corners of the vertical pop tart using the horizontal pop tart as your guide. This will create slants for your roof to lay against.
- Turn your horizontal pop tart side ways so the top edge meets the corner of the slant you just made and carefully saw off the over hanging edge so the second pop tart is now a square.
- Repeat the first two steps giving you two of each piece, in addition to two whole pop tarts for roof pieces.
- Mix powdered sugar and small amounts of water to make royal icing. Ideal icing will have a thicker consistency - more concrete or paste.
- Using icing assemble your house by placing one of the angled pop tart pieces face down. Apply a healthy amount of icing in a line where your first square side piece will go. Repeat this with the other side.
- Carefully stand the house up and apply the second slanted piece so the base of the house is now assembled. Let this set for 5 minutes before applying the roof pieces.
- Using a generous amount of icing apply the whole pop tarts to the top of the holiday house base, one side at a time. You will have to hold these pieces on for a moment to make sure they are secure.
- After letting dry for a few minutes decorate using royal icing to adhere candies and decorations.
Notes
- Make sure to use a serrated knife to gently saw your pop tarts when cutting to size to prevent breakage.
- Assemble your houses ahead of time so they have time to dry before decorating for more stability.
Don't miss other helpful tips and tricks and a step by step photo instruction found in the full article above.
Recommended Products
As an Amazon Associate and member of other affiliate programs, I earn from qualifying purchases.
Nutrition Information:
Yield: 2 Serving Size: 1Amount Per Serving: Calories: 846Total Fat: 14gSaturated Fat: 5gTrans Fat: 0gUnsaturated Fat: 9gCholesterol: 0mgSodium: 500mgCarbohydrates: 174gFiber: 3gSugar: 108gProtein: 6g


